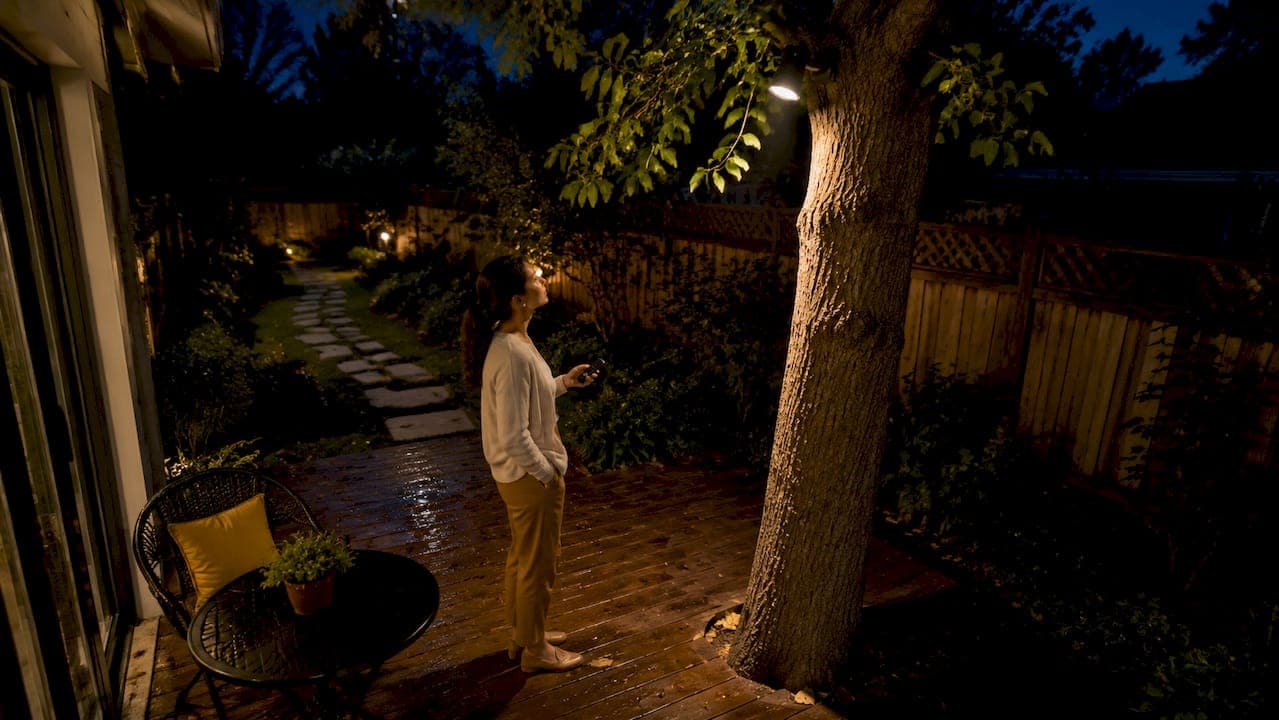
Downlighting in landscapes is defined as a technique where fixtures are mounted at elevated heights to cast soft, directed light downward onto outdoor spaces. Unlike harsh spotlights, this approach mimics the natural quality of moonlight, producing gentle pools of illumination that feel organic rather than artificial. The result is an outdoor environment that looks beautiful after dark while remaining safe and navigable. Whether you manage a residential property or a commercial space, understanding how downlighting works gives you a real advantage when planning your outdoor lighting design.
What is downlighting in landscapes and how does it work?
Downlighting is achieved by mounting fixtures at heights ranging from 12 to 40 feet, typically in trees, on eaves, under pergolas, or along rooflines. At that elevation, the light spreads naturally before it reaches the ground, softening the beam and reducing glare. The effect is closer to standing under a full moon than standing under a floodlight.
The technical details matter more than most homeowners realize. Moonlighting, a premium sub-category of downlighting, uses warm color temperatures in the 2700K–3000K range and a beam spread of 60 degrees or wider. That combination produces soft, even illumination that filters through leaves and branches rather than blasting a flat circle onto the ground. The warmth of 2700K–3000K mirrors the color of candlelight or a sunset, which is why it reads as natural and comfortable to the human eye.
Here is what separates a well-executed downlighting setup from a mediocre one:
- Fixture height: 15–30 feet is the sweet spot for most residential applications
- Beam spread: 60 degrees or wider for diffused, ambient coverage
- Color temperature: 2700K–3000K for a warm, natural tone
- Fixture placement: Aim through foliage, not past it, to create dappled shadow patterns
- Fixture type: LED PAR or MR16 bulbs in weatherproof housings work best outdoors
Pro Tip: Place fixtures slightly off-center from the canopy of a large tree rather than directly beneath it. The light filters through more leaves, creating richer shadow patterns on the ground below.
How does downlighting compare with uplighting in landscapes?
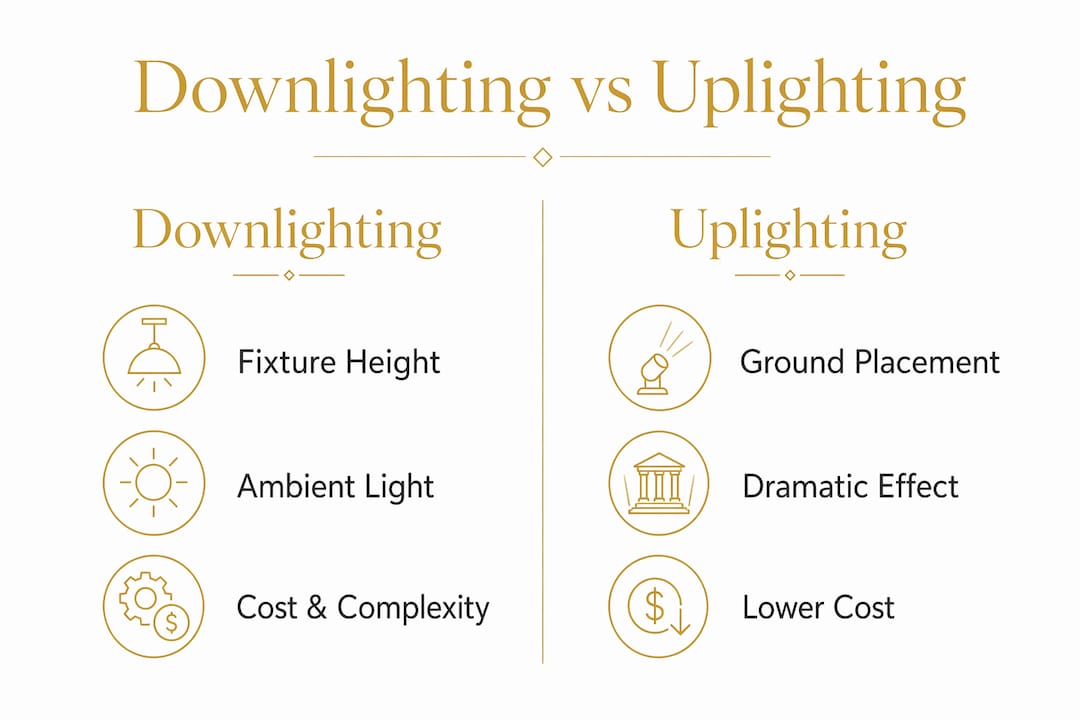
Downlighting and uplighting serve different purposes, and confusing the two leads to outdoor spaces that look either flat or disconnected. Downlighting produces soft, ambient light from above, covering broad areas with a comfortable, grounded feel. Uplighting shoots light upward from ground level to highlight vertical features like tree trunks, stone walls, or architectural facades.
The visual effect of each technique is nearly opposite. Downlighting makes a space feel inhabited and relaxed. Uplighting creates drama and draws the eye upward. Neither is superior on its own. Expert designers recommend a layered approach where downlighting establishes the ambient foundation and uplighting adds focal points and accents.
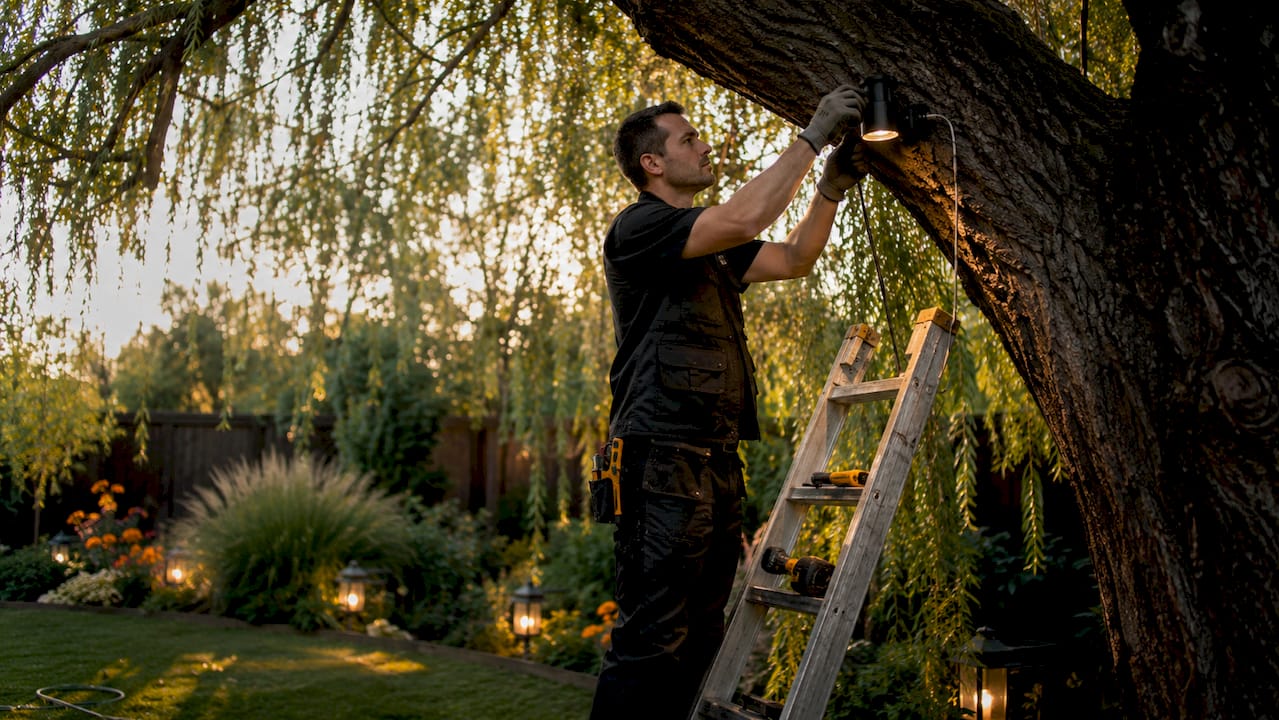
Cost and complexity differ significantly between the two. Downlighting installation is generally more expensive and more complex than uplighting because fixtures must be mounted at elevation, which requires more labor and longer cable runs. Uplighting fixtures sit at ground level and are far easier to install and reposition.
| Attribute | Downlighting | Uplighting |
|---|---|---|
| Fixture placement | Trees, eaves, pergolas (12–40 ft) | Ground level, at base of feature |
| Beam direction | Downward | Upward |
| Best application | Patios, pathways, broad coverage | Trees, walls, architectural accents |
| Visual effect | Soft, ambient, natural | Dramatic, bold, directional |
| Installation complexity | Higher | Lower |
| Glare risk | Low when mounted correctly | Moderate if aimed toward seating |
Pro Tip: Start with downlighting to establish your ambient base layer. Add uplighting only after you have covered the ground plane. This order prevents the "floating lights" effect where bright accents hover over a dark, uninviting ground.
What are the design benefits of downlighting, including the role of shadows?
Downlighting grounds an outdoor space by replicating the way natural light falls from the sky. That top-down direction is what humans experience all day long from the sun. Recreating it at night makes a yard feel comfortable and familiar rather than staged or theatrical.
The role of shadows in landscape design is one of the most underused tools available to homeowners. Shadows created by downlighting add depth, define space, hide imperfections in hardscaping, and produce a visually layered scene that flat lighting cannot achieve. A single well-placed downlight in a mature oak tree can cast dozens of overlapping leaf shadows across a patio, turning a plain concrete surface into something that looks alive.
"Designers should embrace shadows as a creative element rather than view them as a problem to solve." — Legacy Landscaper
The specific design benefits of downlighting landscape designs include:
- Depth and dimension: Overlapping shadows from foliage prevent the flat, washed-out look of floodlighting
- Space definition: Light pools naturally separate zones like dining areas from garden beds without physical barriers
- Imperfection concealment: Shadows soften uneven pavers, aging wood, or patchy lawn
- Safety without harshness: Pathways and steps stay visible without the glare of a direct spotlight
- Seasonal variation: As trees lose leaves in fall and winter, shadow patterns shift and the light quality changes naturally
Without downlighting as the ambient foundation, outdoor lighting can look disconnected and uninviting. Uplighting alone leaves the ground in darkness, creating a "floating" effect where lit features appear to hover over a black void.
How to use downlighting effectively: installation tips and best practices
Getting downlighting right comes down to three decisions: where you mount the fixture, what beam angle you choose, and how you layer it with other light sources. Get those three right and the rest follows.
-
Mount at the correct height. The most common mistake is placing fixtures too low. Ideal installation height is 15–30 feet to avoid harsh glare and achieve soft, diffused light. A fixture at 8 feet creates a tight, uncomfortable pool. The same fixture at 20 feet spreads light across a much wider area with far less intensity at any single point.
-
Choose a wide beam spread. Beam angles of 60 degrees or wider are standard for ambient downlighting. Narrower beams (under 30 degrees) are better suited for uplighting accent work. Using a narrow beam in a downlighting application produces a harsh spotlight effect that defeats the purpose.
-
Select warm color temperatures. Stay in the 2700K–3000K range for residential landscapes. Cooler temperatures (4000K and above) read as clinical and industrial, which is rarely the goal for a home garden or patio.
-
Layer with other techniques. Downlighting alone covers the ground plane but leaves vertical features unlit. Combine it with path lights for low-level definition and uplighting for accent drama. The layered lighting approach produces a complete, professional result.
-
Plan for maintenance access. Fixtures mounted in trees need periodic adjustment as branches grow. Use adjustable mounting brackets and document fixture positions so you can re-aim lights after seasonal pruning.
Pro Tip: Use a lighting budget calculator before purchasing fixtures. Downlighting projects often cost more than homeowners expect because of the elevated mounting labor. Knowing your budget upfront prevents mid-project compromises that hurt the final result.
Where and when should you use downlighting in your outdoor space?
Downlighting works in almost every outdoor zone, but some applications deliver more value than others. The key is matching the technique to the function of the space.
Downlighting softly illuminates patios, pathways, garden beds, and driveways while enhancing both usability and visual appeal. Here is where it performs best:
- Patios and outdoor dining areas: Overhead downlighting from pergola beams or nearby trees creates a restaurant-quality atmosphere without the harshness of a wall-mounted flood
- Pathways and walkways: Downlighting from low tree branches or eave-mounted fixtures keeps paths visible without the repetitive pole-light look
- Garden beds: Angled downlighting from above highlights plant texture and color while casting interesting shadows across mulch and stone
- Driveways: Wide-beam downlighting from tall trees provides broad, even coverage that improves security camera visibility and guest navigation
- Water features: Downlighting from above a pond or fountain reveals water movement and reflection in a way that underwater lighting alone cannot
| Outdoor zone | Recommended mounting height | Primary benefit |
|---|---|---|
| Patio / dining area | 15–20 ft (pergola or tree) | Ambient comfort, social atmosphere |
| Pathway | 12–18 ft (low branch or eave) | Safe navigation, low glare |
| Garden bed | 15–25 ft (tree canopy) | Texture, shadow play, color rendering |
| Driveway | 25–35 ft (tall tree) | Broad coverage, security |
| Water feature | 15–20 ft (adjacent tree) | Reflection, movement visibility |
Seasonal timing also matters. Spring and summer provide dense foliage that creates rich shadow patterns. Fall and winter, when deciduous trees lose their leaves, produce cleaner, brighter light pools. Adjust your fixture aim seasonally to account for these changes and keep the effect consistent year-round.
Key takeaways
Downlighting is the ambient foundation of every effective landscape lighting design, and getting the height, beam angle, and color temperature right determines whether the result looks natural or forced.
| Point | Details |
|---|---|
| Definition and height | Downlighting uses fixtures mounted 12–40 ft high to cast soft, downward light that mimics natural moonlight. |
| Moonlighting technique | Use 2700K–3000K color temperature and a 60-degree beam spread to achieve natural, dappled shadow effects. |
| Shadows as a design tool | Intentional shadows from foliage add depth, define zones, and hide hardscape imperfections at night. |
| Downlighting vs. uplighting | Downlighting covers the ground plane with ambient light; uplighting adds drama to vertical features. Layer both for best results. |
| Installation priority | Mount fixtures at 15–30 ft minimum to avoid glare and achieve the soft, diffused quality that makes downlighting effective. |
Why downlighting is the part most homeowners get wrong
I have reviewed hundreds of landscape lighting projects, and the same mistake shows up constantly. Homeowners invest in beautiful uplighting on their trees and architectural features, then wonder why the yard still feels cold and uninviting at night. The answer is almost always missing downlighting.
Uplighting is seductive because the results are immediately dramatic. You aim a fixture at a tree trunk and the transformation is instant and obvious. Downlighting is subtler. You do not notice it the same way. What you notice is its absence. When the ground plane is dark, the lit features above it look disconnected, like ornaments floating in a black room.
The second mistake I see is fixture placement that is too low. A downlight at 8 feet is not a downlight. It is a glare source at eye level. The magic of this technique depends entirely on elevation. At 20 feet, the same wattage spreads across a 15-foot diameter with a softness that feels almost like natural light. Drop it to 8 feet and you get a harsh, uncomfortable beam that makes people squint.
My honest advice: treat downlighting as the first layer you plan, not the last. Decide where you want ambient coverage, then add accent and path lighting around that foundation. The AI landscape lighting guide from Lumencastapp walks through this layering process in detail if you want a structured framework to follow.
The homeowners who end up happiest with their outdoor lighting are the ones who resist the urge to skip straight to the dramatic accents. Build the foundation first. The drama follows naturally.
— Chris
See your downlighting design before a single fixture goes up
Planning downlighting is much easier when you can see the result before committing to installation. Lumencastapp transforms a standard daytime photo of your property into a photorealistic nighttime mockup in under 60 seconds. You can see exactly how downlighting from your oak tree will fall across the patio, or how eave-mounted fixtures will cover your front walkway, before any drilling or wiring begins.

Contractors and property managers use Lumencastapp's lighting proposal software to present downlighting concepts visually during consultations, which dramatically increases client confidence and project approval rates. You can also explore sample projects to see real downlighting mockups and get inspiration for your own space. Start visualizing your outdoor lighting design today at Lumencastapp.
FAQ
What is the ideal mounting height for landscape downlighting?
The ideal mounting height for downlighting is 15–30 feet. Fixtures placed below 15 feet risk creating glare and harsh, tight light pools rather than the soft, diffused effect downlighting is designed to produce.
What is moonlighting in landscape design?
Moonlighting is a premium downlighting technique where fixtures are mounted high in trees and aimed downward through foliage. The wide beam filters through leaves to create dappled shadow patterns that closely mimic natural moonlight.
How is downlighting different from uplighting?
Downlighting casts soft ambient light downward from elevated fixtures, covering broad ground areas with a natural feel. Uplighting directs light upward from ground level to highlight vertical features like trees and walls with a more dramatic effect.
What color temperature works best for outdoor downlighting?
A color temperature of 2700K–3000K is the standard recommendation for landscape downlighting. This warm range produces light that reads as natural and comfortable rather than clinical or industrial.
Can downlighting work in a small garden?
Downlighting works well in small gardens when fixtures are mounted in a single tree or on a low eave at 12–15 feet. A single well-placed fixture with a wide beam can cover an entire compact patio while creating layered shadow effects that make the space feel larger.